
Let’s establish some basics, then we’ll dive into the nuance…
Shall we?
What are we talking about? Cover panels have many names and there are several types of them. Let’s break out our handy-dandy Cabinet Jargon Thesaurus–just to make sure you’re here because you want to be. Maybe you use a different term than I do–I don’t judge!
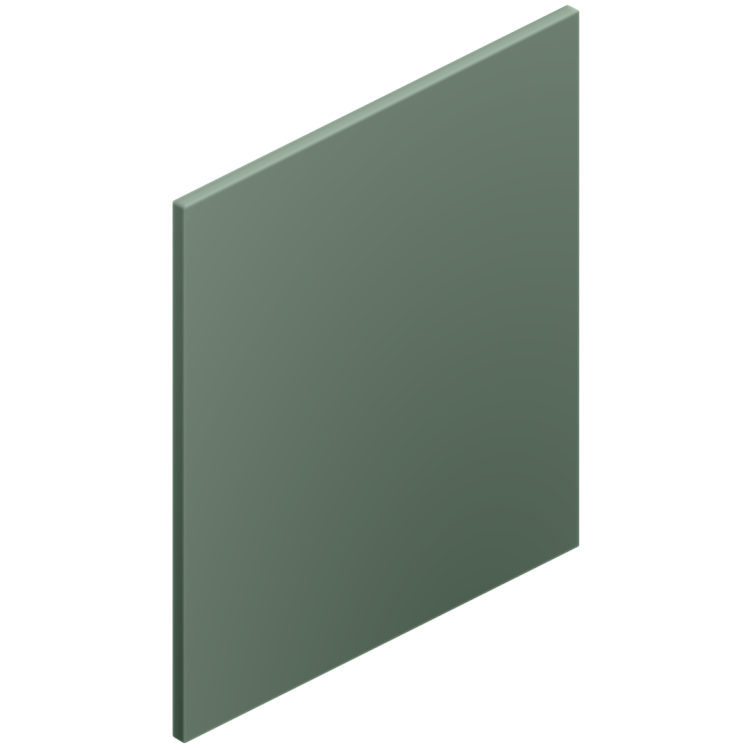
Cover Panel
noun
SYNONYMS
Applied Panel, Decorative Panel, End Panel, Filler Panel, Fixed Panel, Side Panel
SUB-TYPES
Supporting Cover Panel, Dividing Cover Panel, Island Cover Panel (side or back), Peninsula Cover Panel (side or back), Base (Lower) Cover Panel, Pantry (Tall) Cover Panel, Wall (Upper) Cover Panel, False Door, Refrigerator Cover Panel, Built-Out Cover Panel, Valence
To be clear, you do not need to remember all of these in order to ask questions or talk about them. The point being made is that there are potentially many purposes for a cover panel and everyone has their own jargon. In reality, unless you’re trying to differentiate between multiple cover panels in a plan, don’t stress about using the most accurate or descriptive term for that cover panel. We have many ways of clarifying what’s being talked about and arriving on the same page. Also… a lot of the time, a cover panel is a cover panel no matter how you use it or what you call it.
When should I use a cover panel?
At the most basic level a cover panel is used to cover something–whether it be the side or back of a cabinet, a gap between cabinets, to create a sensible division, to cover the side or back of an appliance. Alternatively cover panels can also provide some (but should not be the primary source of) support where the countertop continues but the cabinet boxes do not (e.g. a dishwasher located at the very end of a cabinet run.) Nonetheless, here is a list of specific situations where cover panels are typically used:
- To cover the side or back of an exposed cabinet box
- Let’s say that you’ve purchased and installed cabinet boxes from IKEA in your newly remodeled kitchen. The boxes themselves are white–inside and out. You install doors that are… not white, or at least not the same white as the cabinet box. If you want your cabinets not to appear as a mismatched set, you can order a cover panel to either complement or match the doors to cover the exposed sides of the box. This creates visual continuity and better “fills out” your kitchen.
- To fill a gap between cabinets
- Perhaps there is some unmovable, unchangeable element that exists in your house that effectively breaks up your cabinetry (i.e. a column, a support beam, a wall, some sort of utility) or perhaps the standard sizing of the cabinet boxes you ordered just don’t allow for full utilization of your space, nonetheless there is a gap. One potential solution is to cover this gap with a cover panel that serves as a false door (this may be a situation where a filler is actually best, it’s always a judgment call.) This way your cabinets appear to continue on as normal and you avoid breaking up the visual rhythm you’ve worked hard to include in your design.
- To create a sensible division
- In most cabinet projects, and this is especially true the larger they get, people will create transitions between cabinet heights, depths, and elevations. Sometimes these transitions are intentional in order to break up and make cabinetry appear visually interesting. Sometimes these transitions are there because the space forces them to exist. In any case, adding a flat-slab cover panel in the middle of these transitions helps to make these changes appear clean and intentional. Almost always, these are flat slab cover panels in the same material type, color, or finish as the rest of your doors/drawer fronts, installed flat against the side of cabinet boxes. There are guidelines and a strategy to sizing/placing these cover panels. Something we will cover later.
- To cover the side or back of an appliance
- It is common to want your appliances to feel like they are a part of your cabinetry–or at the very least to help make your appliances feel like they belong in the space you’ve created for them. If you want to create a built-in look it becomes necessary to create an opening sized for the appliance. If the appliance being conceptually referred to here is on the very end of a run of cabinetry, this usually means that one side of the appliance would be exposed, unless, of course, we cover it up.
- It is fairly normal for refrigerators and dishwashers to fall into this situation. Refrigerator cover panels are typically the largest components in a cabinet door order. If an appliance is flanked by cabinets, there is usually not a need to use any cover panels (perhaps fillers if your design requires specific spacing.) In these situations cover panels usually go all the way to the floor and it is common for them to help support some element of the cabinetry, such as a countertop or a cabinet over the fridge. It is not advisable to use a normal cover panel as the primary source of strength in any sort of structural situation.
- To provide structural support
- As stated above… in most situations, regular cover panels should not be used as the primary source of structural support for a countertop or a cabinet. Cover panels can aid in supporting these elements, but be aware that this is not how they are designed to function. Most cover panels should be viewed as decorative. Some custom cabinet shops can create cover panels that are decorative and also structural, but this needs to be clearly communicated to the cabinet maker from the outset. It is possible to apply a cover panel to structural elements in a way that completely covers them. There are almost always several strategies a person can employ to achieve their design goals and perform a safe installation.
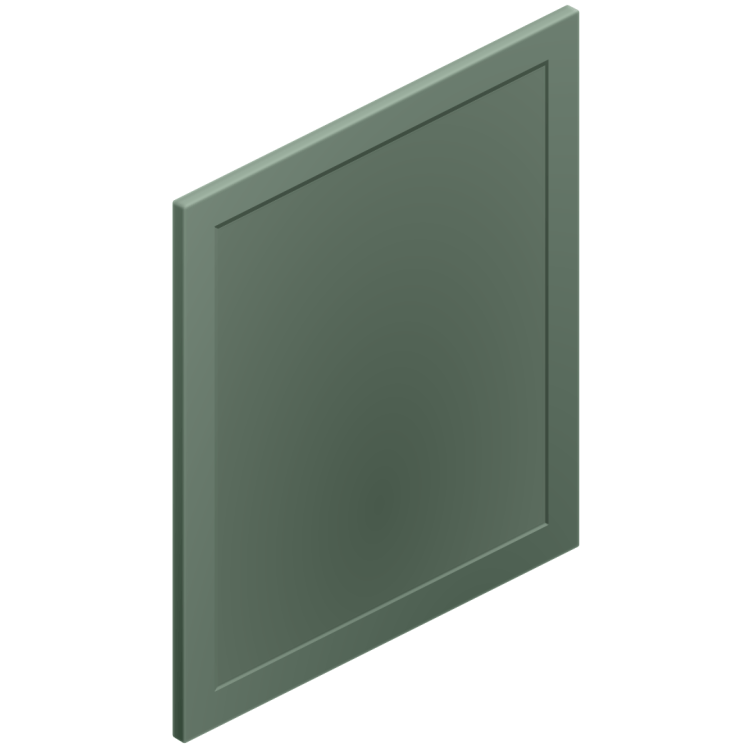
Flat Slabs or Door Matching Cover Panels?
Of course, this question means nothing if the style of doors you’re getting are also flat slabs. With that being said, if your door style is not a flat slab you could stylistically get away with using either a flat slab or a door matching panel. In our order builder there is nothing stopping you from ordering a custom door to be used as a cover panel! This will ultimately be a judgment call for whoever is making the design-related decisions. Flat slabs are always more affordable, they’re simple to use and make sense of, and they’re more flexible in their utility when you need to take detours in your original plan and repurpose them.
Ideally, this decision should be made according to your stylistic vision. We do our best to encourage folks to include some sort of consideration to the cost of cover panels as early on in the process as possible so that they don’t find themselves getting deep into this process and discovering that the “extra” items are blowing the budget, thus forcing a person to go all the way back to the beginning and begin making difficult compromises on things they’ve already set their hearts on. Avoid the trap of filling your budget with just the doors and drawer fronts, so that you can make the proper stylistic decisions on cover panels and other extras when that time comes.
So what works best with your vision? Should the sides of your cabinets look just as gaudy and embellished as the fronts? Or is your kitchen full of tight corridors therefore making more detailed cover panels seem like a waste of resources? Hop on Pinterest, Google image search, or design blogs and pay attention to those cover panels. Decide what works best for your space. There are many ways to configure your cover panels and it plays a huge role in how coherent and “custom” your kitchen cabinets appear.
There are a few situations where you are more-or-less forced to use flat-slab cover panels. These may include: a) Using cover panels as a division between cabinet groups of differing height, depth, or elevation. b) Situations where exact sizing is unknown and you intend to over-size so that you can trim or scribe the cover panel on site. c) You intend to abut shelving or other non-cabinetry element up against a cover panel after it is installed. The good news it that there are flat slab versions of essentially every door style we offer.
Pricing!
If a person is unfamiliar with the in-depth aspects of designing a kitchen–especially as it pertains to pricing out components for a remodel, many will be shocked to discover that cover panels are one of the largest overlooked expenses. Of course, each project is unique. Consider for a moment, cover panels are very similar in construction to doors–especially if you want your cover panels to be built in the same style as your doors. Some of the largest individual components in your kitchen are likely to be cover panels, so it will greatly affect how much you’re paying for shipping let alone their own square foot cost. The reason I’m talking about pricing at this point is because price often plays a big role in whether people choose flat slabs or door matching cover panels, or whether they’re included at all. In my experience, the best kitchens have carefully placed cover panels, fillers, and molding throughout. If the cost of cover panels is an after thought and you see the bottom line of your remodel breaking through the ceiling, this is usually the point where folks will go back to the beginning and start making all sorts of compromises.
As someone who has been many hundreds of people’s guide through this journey, I certainly wish I could have somehow been there to help earlier on in the process. For this reason I am making an effort to include these words of warning earlier on, when the information is actually useful! Therefore our website is being constructed, from the very beginning, to serve as a guide or a collection of resources to people considering a kitchen remodel.
Cover Panels & Toekick Space
Base cover panels (both counter-height cabinets and tall pantry cabinets) can be configured to either cover just the cabinet box or also extend to the floor. This decision making process is often filled with “if -> then” statements. So, let’s jump into it.
- IF you wish to maintain your toekick space, THEN you should stick to cover panels sized to the cabinet boxes wherever possible.
- The toekick space is exactly what it sounds like (in case you didn’t already know!) It’s the space underneath cabinet boxes that allow your toes a few inches of space so that you can stand closer to your work (on the countertop) more comfortably.
- This is usually most important where the countertop overhang is minimal, which is mostly true for perimeter cabinets, and less true for island cabinets. Islands typically have larger countertop overhangs and so taking your cover panels to the floor is more common in these situations. The same is true for the lateral ends and backs of peninsulas.
- IF you anticipate that the environment these cabinets will live in are likely to experience standing water, THEN you should avoid using cover panels that extend to the ground.
- Bathrooms are an excellent example of this. In fact, this is the reason that floating vanities are so popular in bathrooms. If any wood or wood product component is standing on the ground and water is allowed to soak into, it is likely that you will experience damaged finish, water soaking into wood fibers, MDF swelling, plywood or thermofoil delaminating. If your kitchen experiences standard water situations often, perhaps avoid using cover panels that touch the ground. This way you are only replacing toekick material and not an entire cover panel.
- IF you need a cover panel to assist in the structural support of some element, THEN you probably need to take your cover panel to the ground.
- There are many more “if -> then” situations that are highly specific. We’re happy to help offer strategies based on our offerings if/when they manifest.
Oversizing and Scribing
In an ideal world where everyone’s walls, floors, ceilings, and cabinet installations are plum, level, and straight… there would never be a need to oversize and scribe components. Alas, even installations in newly constructed homes will experience these situations.
Oversizing and scribing is a common method of dealing with an imperfect world. Helping components fit neatly and in a visually appealing way can be a good deal of a kitchen installer’s battles. So imagine this scenario: You’ve installed a row of wall cabinets. The cabinets themselves are installed level, square, and plum. You notice as you hold up the first cover panel, to be installed on the lateral side of the right-most cabinet that there’s something wrong. The gap where the wall meets the cover panel seems normal up top, but it is significantly larger down near the bottom… how could this be? You put your level up against the wall and can see that, although the wall is “straight”, the wall is tilted! The measurement from the front of the cabinet box to the wall up top is 14 ¾” but down below it reads 15 ⅛”. Just then, you remember that your cabinet salesperson recommended getting oversized cover panels when you described your house as “old”, “wonky”, and “having… maybe too much character.”
You check the cover panel once again and see that it is 16″ wide. In a perfect world, with the doors on the cabinet, this would finish out at 15 ½”. Using your handy reciprocating saw you cut a tapered cut that is 15 ½” up top and 15 ⅞” down below, it’s cutting it close but as you slide your cover panel into place, it fits perfectly–just like it belongs there! Crisis averted!
The same type of situation can occur with your ceiling and your floor. Yes, sometimes you can simply install some quarter-round molding or scribe molding, but sometimes the amount needing to be compensated for is just too great for molding to overcome. Moreover, a cleaner, more minimalistic installation usually involves several well executed scribe cuts. There will eventually be an in-depth article here on scribe cutting as it can apply to more than just cover panels. When that article is written, it will be linked to here—however there’s nothing stopping you from venturing over to YouTube or Google to learn more about scribing fillers and cover panels.
